The File Menu
The File Menu
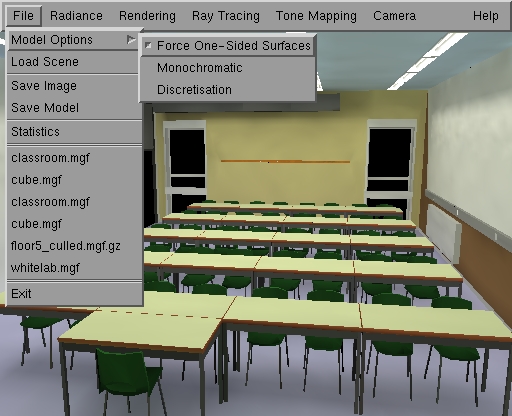
Model Options:
Options to be set before loading a 3D model:
-
Force One-Sided Surfaces:
a 3d model can contain single sided and double sided surfaces. With this
option enabled, all surfaces in an input file will be considered single
sided, even if they are double-sided in the input. This option is recommended
for appropriately modeled scenes, that is: scenes in which all objects
are modeled by closed surfaces. It saves storage and computation work.
It is required for proper handling of transparency. Disable this option
if polygons in your model have inconsistent or wrong vertex order, in which
case parts of the model do not appear in the view except if back face culling
is disabled in the Rendering menu. Unless the surfaces are explicitly modeled
as single sided surfaces in the input, the model should now look right.
-
Monochromatic: convert all surface
colors in the input to shades of gray.
-
Discretisation: specify the number
of segments in approximating quarter circles. Used for discretising spheres,
cylinders and tori to polygons. A higher number yields a more smooth approximation
at the cost of more polygons (and thus storage and computation time). A
number of 4 is often OK.
Load Scene:
A File Selection Box appears. You can select
a file containing a 3D model to be loaded. The selected file is loaded
after pressing the OK button in the file selection box, or by double
clicking the file name in the list. You can also directly type the name
of a file to be loaded in the "Selection" text field.
File Selection Box for loading a 3D model.
Currently, RenderPark loads models in the
MGF file format. Files
in this format should have .mgf extension. RenderPark recognizes additional
file extensions such as .Z, .gz, .bz, or .bz2 and will automatically uncompress
such files using the commands 'uncompress', 'gunzip', 'bunzip' and 'bunzip2'.
Make sure your PATH environment variable is set properly so that these
commands are found. If the first character of the file name is a '|', RenderPark
starts the command following the '|' and reads its standard output.
Save Image:
A file selection box, similar to the one for
loading files (above), appears. You can use it to select or type the name
of an image file. After pressing the OK button, the current image in the
canvas window is read back from the screen and stored in a file with the
selected name.
This way, only low dynamic range images
can be saved, in either PPM format (.ppm file name extension) or LZW compressed
RGB TIFF images (.tif file name extension). Again, file name extensions
.Z, .gz., .bz and .bz2 are recognized. RenderPark will compress the image
using 'compress', 'gzip', 'bzip' or 'bzip2'. If the first character of
the file name is '|', RenderPark will start the command following the '|'
and feed the image to the standard input of that command.
Use ray tracing or ray casting in order
to save a high-dynamic range image of the current view.
In order to be able to write TIFF output,
RenderPark shall be compiled with TIFF support. See the installation instructions.
Save Model:
Save Model works in the same way as Same
Image (above), except that the current illuminated 3D model (after a radiosity
computation) is saved into a VRML'97 file. The file name extension shall
be .wrl.
Statistics:
Brings up a dialog containing some statistics
about the currently loaded scene:
Scene statistics panel.
Recent files list
Between the Statistics button and the Exit
button, the six most recently loaded files are listed. By clicking on these
names, these files are re-loaded and displayed with the same primary and
alternative view point as they were left the previous time.
Exit
Terminates RenderPark.
Page maintained by the
RenderPark web team
Last update: October 31, 2000